Friday, May 29, 2009

Alice in Wonderland Tea Party Sign

Southern California is a place I love - having lived there for many years. Three years ago we moved to Nor Cal (and we're really liking it). In March, my husband had a business trip to Pasadena and I went with him. You can't visit So Cal and not visit the favorite places you use to shop at. So I called my dear friend Donna - she drove to Pasadena and picked me up and we went to our favorite haunts in LA. These aren't just places I went to and loved, these are stores I shopped and "window shopped" at regularly. Downtown LA is bargain shoppers paradise, but it's also known for being rundown and grimy.
About seven years ago I started a party company - Party Wishes. Donna and I became friends when she was one of my party customers. When we found out we were moving, I sold her my party company - she was the perfect party gal!
So, here we were in one of our favorite stores on the lookout for "Alice in Wonderland” items for a party she was planning. We went up and down the store aisles - I happened to look up and at the very, very top of the shelves were these enormous stacked teacups. Bingo! They were perfect - it made her day and mine as well. I couldn't wait to see what she was going to do with the teacups (originally they were white). As you can see - she is quite the talent.


Donna made this adorable wood tea party sign (purchase thin plywood at any local hardware store - draw your shape and cut out with a jigsaw). Her instructions for getting the lettering just right: "You don't have to be a trained artist to get a custom painted look. I'm making signs for my Mad Hatter Tea party and I thought I would pass along my technique for custom signs.
First, I pick a font on my computer and print it out. Sometimes I have to enlarge it on my copier machine to get the right size I need.
I turn the copy over and hold it on a window (must be done during the day) to see the lettering and I use a #2 pencil and trace the letters and fill them in with a lot of graphite. I do realize that I can use graphite paper or a light box, but this is cheaper.Then, I flip the paper over to the right side and tape it on my already painted sign.
Next, I trace over the lettering again so the pressure from the pencil transfers the markings on the back of the paper onto my wood. Instead of using a paint brush, I use a paint pen. It is a lot easier to control and it's like outlining and coloring when you were a child
."


Thanks for being my friend Donna and continuing the stellar tradition of Party Wishes! If you live in So Cal and need to hire a party planner or would like to see some fabulous ideas, check out her Party Wishes blog!

Please Welcome Our Newest Design Dazzle Contributor!

I wanted to take a moment to introduce our newest Design Dazzle contributor Kristin DeMarco. Kristin has designed many nurseries featured on Design Dazzle including this one shown. She is an expectant mom with great style and a tasteful decorating eye.

Her Bio:
I live in Annapolis MD with my husband and two children. I have a degree in Advertising from Penn State University. I worked in the advertising industry for about 6 years then decided to pursue my dreams of owing my own business. I took courses in residential design and decided to specialize in designing Kids spaces. I was hired to be the in-house designer at an upscale nursery boutique in Annapolis, MD and really enjoy working with parents to create the most special environment for their children. I offer a "Surprise Design" package that includes options for both boy and girl nurseries and then with a Dr.'s secret note, complete the custom room before baby comes home for the first time. We have a new baby on the way I am anxious to get started on the new room! Stay tuned for before and after pictures!

Kristin will be a great addition to our blog - she has designed some amazing nurseries! Welcome aboard Kristin! Her first post can be read below.

Planning Your Baby Nursery

Before picture:

After picture:
You have nine months to create a spectacular space for your new addition! Not only will the space be used for your sweet infant, it will be a place where the rest of the family will spend many precious moments. So start with a plan and have fun decorating!

The Inspiration: Choose one inspirational element that will carry on throughout your nursery! This element can be anything from the crib bedding, a piece of artwork, a family heirloom or even a favorite color. As long as you stay true to the inspiration, the room will have harmony. Of course it is fun to throw a few unique, whimsical pieces here and there!

The Basics: Room to grow! Your baby will be so tiny at first but you will want a room that will grow with him or her. You will need good quality furnishings that will last throughout the childhood years. The basic needs for a baby and a young child are a crib, storage space, changing area and comfortable chair.

The Style: For the first and perhaps only time—your child’s room will reflect your style! Trust your instincts and stick to your inspirational element. Your baby may not remember their first room, but you will! There are so many options for nursery furnishings and linens so take your time deciding on what is right for your family.

The Plan: Plan your baby’s space! Measure the room walls and any door openings or windows. Arrange the furniture in a functional way. The crib should be the first thing you see when you walk into the room. It is practicable and functional to have the changing area near the crib for easy access. Use newspaper or masking tape to map out the room to make sure it works before you make your furniture purchase. It is better to buy less and add later than to buy too much and have it not fit in the room.
Kristin DeMarco
Design Dazzle Contributor

Congratulations To The Winner!

The winner of the party giveaway by Parties by Hardie is Giggling Kids! CONGRATULATIONS!! I have emailed you and you have 3 days to contact me!
Thanks to everyone who entered! We will be announcing another giveaway soon!

Thursday, May 28, 2009

Cupboard Doors - Made Into Picture Boards & Chalkboards

What to do with old cabinet or cupboard doors? We went through a kitchen remodel a couple of years ago. I still have several doors I haven't tossed yet - knowing I was going to "chalkboard" them; haven't gotten around to it yet - give me a couple of more years:) So I came across these photos from Stacie at The Creative Crate. She has done a few things I wouldn't have thought of with cabinet doors - adding chicken wire to make picture boards and coat hanger hooks to the chalkboard doors. I'm loving these...

Stacie: "Here is another fun, cute way to display pictures. I just took cabinet door frames and stapled chicken wire in the middle with a staple gun. With the clothes pins, I traced around each clothes pin on some scrapbook paper and cut out with an exact-o knife. Then distressed the edges with an ink pad then glued it on. Then I tied a cute ribbon around."


Thank you Stacie for your great ideas! Here's another fabulous chalkboard idea from Stacie.


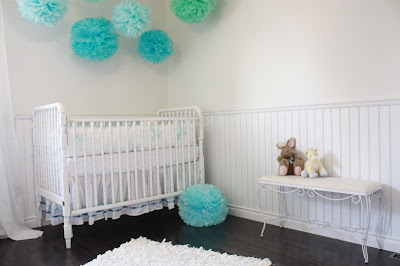
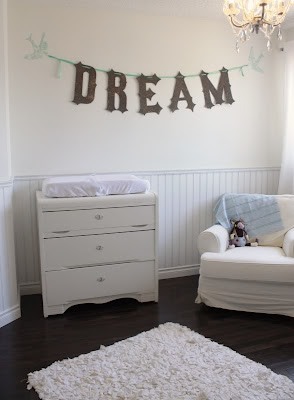
Dreamy Chic Nursery

Refreshing blues and greens make this white on white nursery pop. Holly (from in the fun lane) and her husband remodeled their daughter Wrens room and created a simple but chic baby nursery. Martha Stewart pom pom kit from Michaels.


Wednesday, May 27, 2009

Wednesdays - What Color is That??

Sproutstyles' Dee Devine designed this very mod and cool nursery. Included in her nursery description are all six of the grid paint colors and the brown wall paint color. The monkey art is vintage wallpaper cut-out in the shape of a monkey. Here's the scoop from Dee:
" I had so much fun designing my son's nursery, and I took inspiration from colors and designs I loved for myself and tweaked them for a nursery. First, choosing paint colors was a somewhat arduous task - we went through literally 28 shades of blues and greens for the squares on the feature wall, finally deciding on 3 blue and 3 green, all from Lowe's. (blues - Sea Wave, Seafarer and Beach Sparkle; greens - Green Gecko, Meadow Twilight and Parsley Sprig) The brown is Cliveden Virginia Soil. It was particularly difficult to choose a brown - this one looks a little purple in the swatch but was the only brown out of about 10 that didn't look too gray. "... To read more information and see more photos - click here.

Tuesday, May 26, 2009

Shabby Chic Vintage Nursery

Loving this sweet vintage, shabby chic nursery! Designed by Vicki for her daughter Sofia - Vicki was 9 months pregnant when she painted the tree mural. In a few years this room will transition nicely into a "big" girl room. According to Vicki: "I created this room for my daughter who was born Feb 1st, 09. I've always loved shades of "Tiffany" blue and I think that this room reflects that - Diamond Vogel paint, "Cobalt Blue". I am so happy with how the hand painted wall tree mural turned out. I taped (double sided tape) large fake peonies to the wall to add dimension. The leaves are gold metallic. I also added a peacock last minute. This was all painted in one day while 9 months pregnant! I finally got the Pottery Barn Catalina magazine wall rack that I've had my eye on for a year now (roughly $100). A previously used mirror from another location in the house serves as her dressor mirror (I think it was from Home Depot for about $99). It's a little larger than I think I would have liked ideally, but I've gotten used to it. Corner antique cream estate sale table $27. Two wall shelves $4 each, Hobby Lobby. A hand me down crib from Grandma's house (checked for safety of course), and the white dresser is from American furniture, roughly $350. Curtains are discontinued target Shabby Chic collection from Ebay. Chandelier $130. Brown side table, flea market find $30. Enjoy! The bumper and the fitted sheet are from Target from the Shabby Chic collection."

Cool Basketball Bedroom!

Mother Nursery designs kids rooms and they are talented designers! Kids can actually dribble the ball and shoot for the basket in this basketball bedroom. Here's the scoop from Mother Nursery: "The wall facing the basketball key has a functioning miniature basketball hoop and is outfitted with actual gym wall padding that showcases the boy's middle name. A locker room bench is affixed to the floor under the window which runs horizontal to the basketball key, much of what you would see in a high school gym as the players bench. On top of the window in the center of the wall is the child's logo, a bulldog, the logo is the first thing you see upon entering the room. On each side of the window are custom banners of basketball championships. The bedding used in this environment was from Pottery Barn Teen, it was part of their NBA Bedding Collection. On the wall above the top bunk is a scoreboard that was hand painted with chalk board paint in order to keep score of all future basketball games taking place in this room. A basketball wall mount is fixed to the same wall by the foot of the bunk bed to house all the basketballs used to play either during practice or game time. On the opposite wall; a set of two full size black lockers were added to for extra shelving and/or storage. An American flag hangs next to the closet door. What gym isn't complete without tribute to our country? Over the closet door and bathroom door, hand painted signs were painted as the home team locker room and visitor's team locker room."
Monday, May 25, 2009

Inspiring Chair Transformation!

Not only did Fabulous Fifi take this chair from drab to fab, but she also styled the chair darling! Here is how it all started:

Fabulous Fifi spray painted the entire chair white (the cushion is vinyl fabric), then painted it blue and trimmed it in green. Both pre-teen and teen girls would love a chair like this - heck I'd love a chair like this!

Saturday, May 23, 2009

DIY - Pearl Strand Lamp

Fabulous Fifi designed this lamp made of pearl strands. Isn't it delightful? Lamp made with basket, wire and pearl strands from the bridal section of Michaels.


Have a safe and happy holiday weekend!

Friday, May 22, 2009

Teen Cover Girl Party - Fun Ideas!

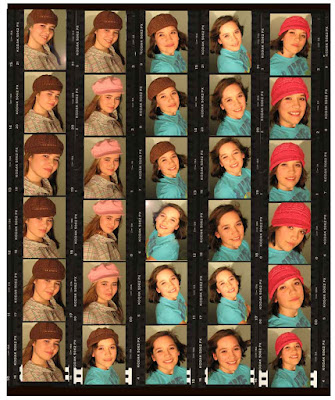
teen girls party ideasTeenagers are especially difficult to plan a birthday for. Saucy's Sprinkles created a fun "13 going on 30" theme party - complete with each guest receiving a makeover, photo shoot and becoming a cover girl. Model shots were taken of each guest, a few "photoshop" additions were completed to create the magazine cover. Each magazine cover was made into an 8" x 10" picture (printed at wal-mart) and then framed - clever, clever! How many teen girls (and younger) would want to take home their very own magazine photo cover!! See more clever photos of this party here.
teen girls party ideasInvitation


teen girls favors for birthdayMany head shots to choose from! We want just the right cover girl look!

party ideas for teen girls
teen girls birthday ideasThe reveal!

Well, I hope everyone enjoyed party week at Design Dazzle! Thank you to everyone who emailed me their party information and photos! Your party will be featured in upcoming posts - we still have so many parties to blog about:)

Thursday, May 21, 2009

The Bus Stop - A Unique Bus Themed Bedroom

Charm & Whimsy is a NYC based interior design firm that designs spaces that are colorful, imaginative and one-of-a-kind for children and adults. Check out one of their fun designs: The Bus Stop is a unique bus bed that is a room within a room. Play, sleep and clothes storage are all accommodated in this transportation themed bedroom. A phone, windshield wipers, rear view mirror and real wheels, albeit, bicycle wheels, all add to the realism for this young driver. No license is required to operate this vehicle outfitted with comfy seating, exit and entry doors and official MTA decals. Next stop?????

Milk & Cookies Party & Baby Shower

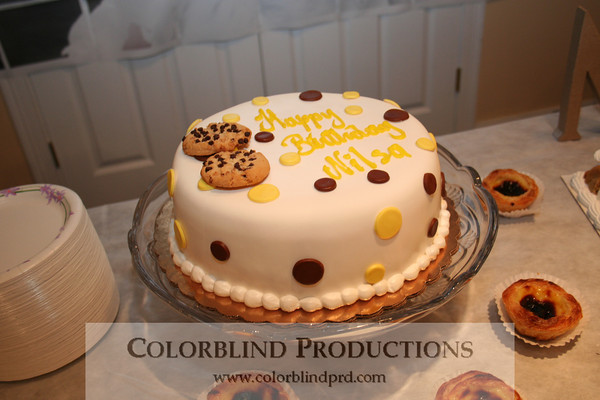
Dianne V. is an event coordinator who created this adorable party for her two-year old daughter. Centerpieces were jars of chocolate, oatmeal, and sugar cookies! Surrounding each jar were photo boxes made of assorted pictures of the birthday girl’s first year of life. The perfect backdrop behind the cake table is of the birthday girl. Dianne made this custom tiled image for the party.
The party colors were brown, yellow and white with polka dot decor. Individual sized milk (whole and chocolate) and brown bags of cookies were given to guests as favors. More photos can be seen on her blog Color Blind Productions.

Here's another adorable Milk & Cookies Party:

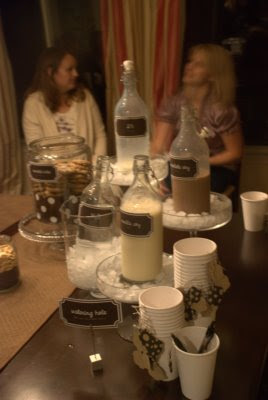
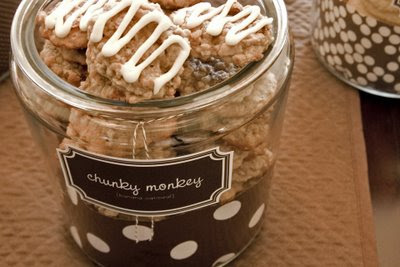
Brit from Most Likely Late came up with this clever milk and cookie baby shower. Brit calls it "Milk and Cookies for the Prego" - loving that:) The labels made for the cookie jars were brown with white writing. Assorted brown and white papers were used inside the cookie jars.
Brit's tip: "Make the cookies in advance. Each cookie jar contains about 5-7 dozen cookies, so call in for reinforcements. There were plenty of helpers on this one, I just sent out recipes of the cookies I wanted to display and we each made a couple. We all used the same size ice cream scoop so they were all about the same size."

Milk jugs with various milks...

Favor bags were brown with a cute tag - guests could fill up their bags with cookies!

Invitation made by Elisa York. These gals are all quite the talent:)