How cool is this wall art made of old books? The spine of the books are covered in duct tape and then situated on floating shelves. Clever, clever! This book wall decor is on display at the Four Hands showroom.
Tuesday, January 31, 2012
Wall Art From Old Books
Hello! I've been a busy girl attending Las Vegas Market at the World Market Center in Las Vegas. Las Vegas Market is a trade show held twice a year showcasing products from various home categories furniture, gifts, rugs, lighting, accessories, fabrics, etc. The World Market Center is an international mammoth-size permanent marketplace for home furnishings. You can't imagine the size of these buildings and how impressive they are. I'm excited to share a sneak peek of some awesome new products!! Check back for fun photos and new products!
How cool is this wall art made of old books? The spine of the books are covered in duct tape and then situated on floating shelves. Clever, clever! This book wall decor is on display at the Four Hands showroom.

How cool is this wall art made of old books? The spine of the books are covered in duct tape and then situated on floating shelves. Clever, clever! This book wall decor is on display at the Four Hands showroom.
Sunday, January 29, 2012
Valentine Free Printable
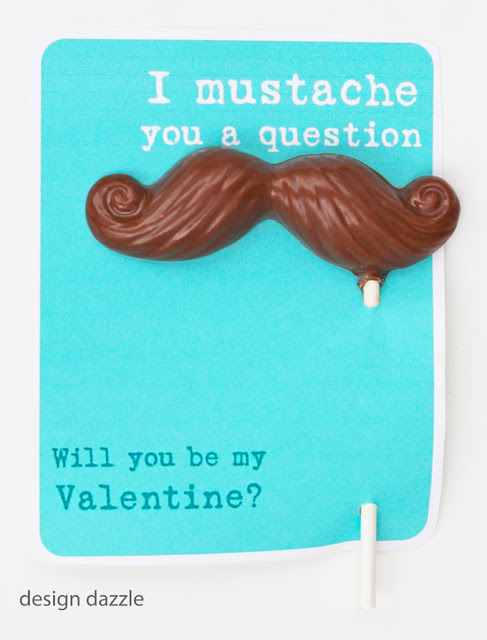
Making Valentines with your kids is a super fun activity. I'm loving the "I {mustache} you a question
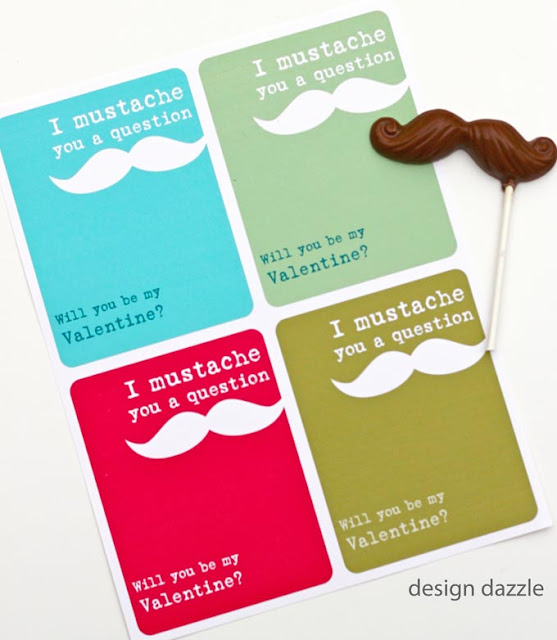
Will you be my Valentine? Here is your own free printable version. No need to add the chocolate lollipop mustache unless you want. The valentine is perfectly cute on its own but certainly receiving a chocolate mustache never hurt anyone.
Instructions:
Melt the candy melts according to package instructions. Spoon the melted candy into mold. Tap mold on countertop to get rid of any bubbles. Add the lollipop stick.
Tip: never add water to melted candy wafers or chocolate. Use melted shortening to thin the consistency.
Print out the mustache printable and cut out each separate valentine.
Punch 2 holes in the valentine (as shown) to insert the lollipop stick in. Place in a clear cellophane bag and seal or tie the bag. For an easy way to seal cellophane bags, check below.
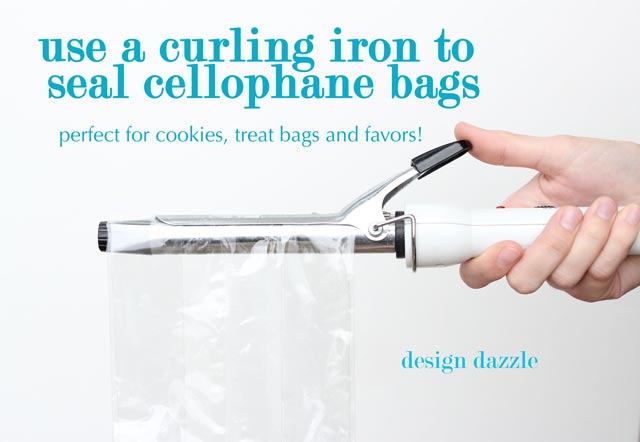
Need to seal a cellophane bag without purchasing an expensive sealer? Use an old curling iron or flat iron. The bags need to be Cello or Cellophane
Update: Sealing a cello bag with a curling iron is the same premise as using an industrial impulse sealer.
I hope you like this too cute mustache valentine!!
Thursday, January 26, 2012
My Favorites & Our Link Up Party - Share Your Awesomeness!
Paisley Petal Events shares this V-day subway art free printable.
Loving your Valentine ideas and EVERYTHING else! Thank you for linking and sharing your awesomeness!
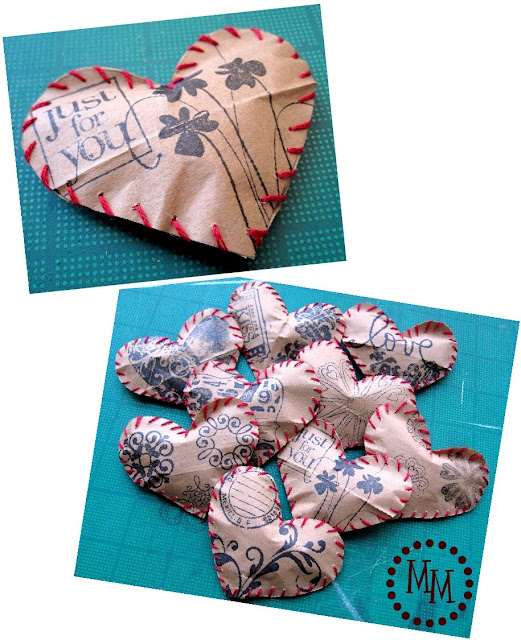
Adorable stuffed paper hearts by Michelle from The Scrap Shoppe
Cake batter truffles from Scattered Thoughts of a Craft Mom
Create, Inspire, Motivate shares the entertainment center to play kitchen complete with before and after pics.
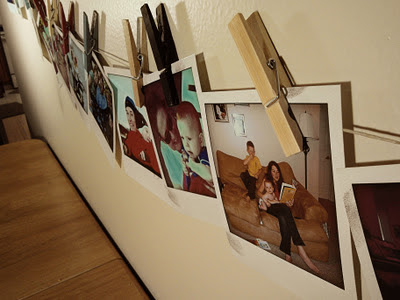
Sisters, Sisters blog shares a tutorial on how to make a photo look like a Polaroid
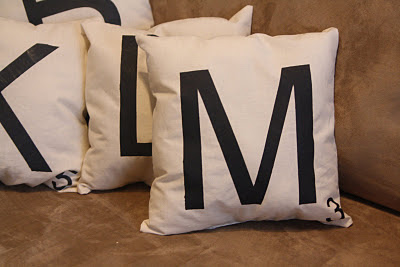
Scrabble Tile pillows from Decorating the Dorchester Way.
Sealed with a kiss bucket of love by Clean & Scentsible
Moore's Minutes shares hot chocolate on a stick.
Suburbs Mama came up with this fabulous gallery wall.
No linking to selling sites or giveaways. Have fun and leave some love (comments) and visit some amazing bloggers.
All link ups should be related to design and decorating with kids (babies, kids or teens)!
Please link back to Design Dazzle so others can share in the awesomeness!
Each week I will choose several of "My Favorites" from the link up party. "My Favorites" will be featured on the following weeks link up party. Your post needs to be linked to Design Dazzle to be considered for the "My Favorites" post.
By entering our link up party, you give Design Dazzle permission to use any part of your post including pictures.
Canvas Dance Bag: Create a Stencil Using Stickers!
I'm excited to be back again blogging with Toni at Design Dazzle! Hope you guys enjoy my latest project!
My little four year old daughter currently takes ballet and it's the CUTEST thing ever! I wanted to create a little dance bag so she can tote around her ballet slippers and THIS is what I came up with!
Last week I found a canvas drawstring back from Michael's for $1! I knew I could turn it into something fabulous with some supplies I already had on hand: paint and a couple flower embellishments I had leftover from my daughter's bedroom lamp makeover.
I decided to stencil this bag with various dance phrases & ballet images, but couldn't find the perfect stencil...nor did I want to spend the money. Then the AHA moment came! I could print out some stickers on my Silhouette Cameo and use the negative side (the backing) as a stencil! Come see what I'm talking about...
I laid out my design on the computer and then cut it out on my Silhouette Cameo. If you don't have something similar, you can just find some different ballet or dance stickers from your local hobby store. Just peel out the stickers so the backing looks like this...
Place the backing from the sticker onto your canvas bag.
Now it's time to pick your colors and start painting! I used a small foam brush to apply the paint. Just dab lightly until you fill in the stencil.
Let the paint dry and then peel up the sticker stencil. I also added a couple flower embellishments with my hot glue gun to fill in some empty spaces from my design.
And that's it! A super cute & unique dance bag for your darling daughter!
The best part? I already had the paint, flowers and sticker material at home. I just had to purchase the canvas bag from Michael's. A ONE DOLLAR PROJECT! No need to spend money; try to use the tools you have on hand for fast & fun projects!
Thanks for letting me share a new project with you today! I hope you guys enjoyed it and can't wait to share another adventure with you next month. And Toni, thanks so much for inviting me to Design Dazzle for the day!
Much ♥ to everyone, Erin
I'm choosing my favorites from last weeks link up party to feature at our link up tonight at 12:01 AM EST or 9:01 PM PST.
Share your awesomeness!
Wednesday, January 25, 2012
Baby Shower Love
I'm in baby shower love! This sweet, adorable baby shower is over-the-top in styling, colors, food, activities and decor! Yes, I'm in love! Kate from And Everything Sweet teamed up with her friends to create a bird themed shower complete with birds, bird nests, bird cages and everything needed to "feather her nest".

The colors are stunning! If you would like to know how to make the pom pom tissue flowers shown, here's a tutorial.
The birds are edible! They're sugar cookies with marshmallow fondant frosting on top.
Too cute!
Love this...guests make hairbows for the baby using fabric and ribbon scraps.
Tuesday, January 24, 2012
Girls Room: Valentine Style
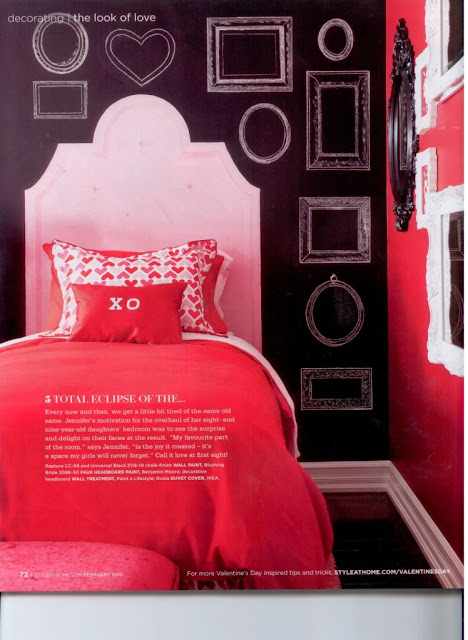
Pure valentine sweetness describes this bold and fun room! Nothing quite makes a statement like red, pink and black! Totally love everything about this room. The white shell pendant chandelier with red hearts is charming and quirky. Designer of this room is the talented Jennifer Brouwer of Jennifer Brouwer Design. Photography by Donna Griffith via here.
Paint colors Benjamin Moore:
Universal Black 2118-10
Rapture cc-66 (red wall)
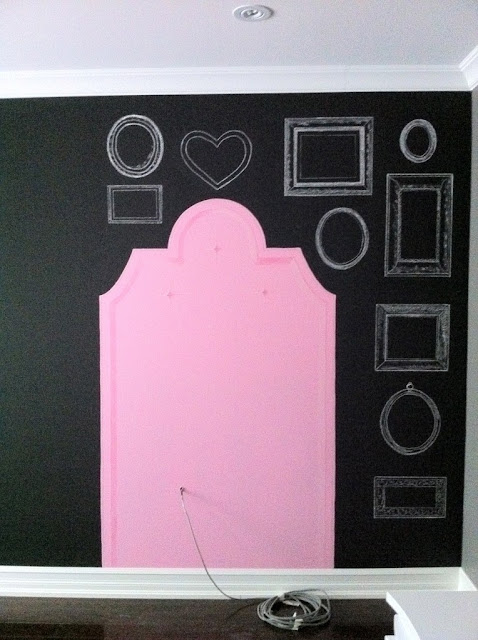
Blushing Bride 2086-50 (painted headboard)
Barbara from Paint A Lifestyle is the decorative and faux painter for this so cute girls room. She did an excellent job with the faux shading and tufting of the "headboard". Love the chalk frames.
Pink tufted headboards are the perfect focal point in a girls room. To check out more details and features of this room purchase the February issue of Style At Home.
Subscribe to:
Posts (Atom)
