Showing posts with label Kids Parties. Show all posts

Wednesday, March 21, 2012

Tissue Tassel Garland Tutorial

Hi everyone!  I'm Trish from the the craft blog, Uncommon, a place where Bonnie (my partner-in-crime and sister-in- law) and I share our love of all things crafty!  I am so thrilled to be here today! 


I love styling beautiful parties.  The only thing I love more is styling beautiful parties without breaking the bank!  One of my favorite elements to use is tissue paper.  It always amazes me how you can take a few sheets of flimsy, inexpensive paper and create something that is  pretty and so memorable!  I have been wanting to try to make a tissue tassel garland, so I thought I would share a tutorial so you guys to make one, too! 


Tissue Tassel Garland Tutorial


Supplies Needed: 


2 sheets of tissue paper  (this will make 2 tassels)
cutting mat and rotary cutter or exacto knife
straight edge or ruler
glue gun and sticks
rope


Let's begin...


1. Open both sheets of tissue paper and align them together.  You may need to iron your tissue if it has lots of creases. 


2.  Fold tissue in half across the width.


3. Fold again, but this time fold lengthwise.  Position the tissue so that the folds are to the top and to the left.


4. You will cut the tissue a little less than 1/2 inch wide.  Line your straight edge up and begin cutting about 2 inches down from the top.


5. Continue cutting across at 1/2 inch intervals.  When you get to the end, cut all of the way up.  You will then separate into two tassels. 


6. Open one of the tassels all the way up with the cut portion on the sides. 


7. Start at the bottom and fold the tissue up until you get to the top.


8. You will now twist the solid part in the middle.


9. Next you will twist it into a loop.  Almost done!


10. Arrange all of your tassels in the order you would like to hang them in.


11. You will  now open the loop and twist on to the rope.  You will want to dab with glue as you twist to make sure it is secure.


12.  Finish adding all of the tassels, brush them down a bit, and you are done! 


Isn't it so vibrant and fun? 


 These sell for a ton in online shops, but you can make one for yourself for just a few dollars!


Thanks so much for having me today, Toni!  I was over the moon excited for this opportunity!  Take care!
* Trish


We'd love for you to stop by our Blog, Etsy Shop, Facebook Page, Twitter, or you can also find us on Pinterest! 


Multi-Color Tissue Paper


=============================================


Thank you for sharing such a wonderful tutorial. Make sure to visit Trish and Bonnie's blog Uncommon you'll be in for a treat!

Toni


Monday, March 19, 2012

Rainbow Party: A Colorful Spectrum Of Inspiration

I would like to introduce our newest Design Dazzle Contributor Gywnn Wasson of Gywnn Wasson Designs. I am so excited to have her on board to share her fabulous party ideas! Welcome Gywnn!


I love planning dessert tables! Few things are more fun than deciding what yummy treats to serve, creating interesting ways display everything and designing a beautiful backdrop that will really help punctuate the feeling of the event. And like a lot of people, I imagine, many times after I pull it all together, I stand back to look at my creation and wonder (just a little bit) if I have made all the right choices. You've been there, right? 


Well, when Toni offered me this wonderful opportunity to contribute to her fabulous blog, I immediately knew that this was the excuse I had been looking for to explore something that I had been dying to do for awhile. How much fun would it be to create a dessert table full of pretty sweets and then experiment with different backgrounds to see how they effect the feeling of the whole table?! And, of course, I knew exactly what theme I wanted to do... Rainbow Party!!! 


So I whipped up some colorful treats (please don't judge too harshly, cooking is SO not my forte!) and ran out and purchased a few more...
And then set about designing a few relatively inexpensive, easy to make, backdrops. 
For the first one I decided to create something really simple. So I pulled out my circle punches, punched circles in three different sizes and several different colors and adhered them to a piece of white thread. Then I strung them in and around a printable party banner...
Clean, simple sophistication. 


For the next one I wanted something a little "louder" that really yelled "PARTY!" 
So I pulled together a selection of pretty paper fans and layered them on my backdrop...
An explosion of color! Your eye definitely is drawn more to the backdrop on this one then to the desserts, but oh, how much fun!


I also wanted to explore something colorful, but subtle enough to not to be over-powering.
So I created a curtain of fringed streamers...
...which really punctuates the rainbow theme and compliments the rainbow treats as well. Definitely softer and subtle.


And as I was wrapping up my little experiment, I thought I definitely couldn't do a Rainbow Party Backdrop Experiment without an actual rainbow! So I set about making a ridiculous number of mini tissue pom poms...
And fashioned them into my very own rainbow!


So there you have it... the Rainbow Party Backdrop Experiment! What do you think? Do you have a favorite? I'd love to hear your thoughts!


Gwynn Wasson is a Party Printables Designer and Boutique Party Designer,
living in the Los Angeles area, and the author of the blog Gwynn Wasson Designs. You can follow Gwynn through her blog Gwynn Wasson Designs and Facebook.


Thursday, March 15, 2012

Nascar Party


Take one NASCAR-loving 5 year old boy and add in a one super creative mom plus two talented grandparents and what do you get? A NASCAR racing inspired party that had both kids and parents revved up and excited to play! Tara, the super creative mom, started with a vision of kids racing around a track. Tara says, "After talking with my dad about how I wanted a race track with race cars for the party, he came up with the design for these amazing NASCARs made from cardboard boxes!  My dad, mom and I cut the designs out of cardboard, painted them, assembled them and printed all the decals and logos on label paper from our printer.  The tires are made from small black paper plates with CDs on them for the rims.  The best part of the tires is that they have Velcro on them so the kids can get new tires at the Pit Stops!  How totally cool is that?"


I don't know about the kids, but I would have had a really hard time picking out which car to use.


Even some of the parents got in the race! I have to admit that I probably would have been right there racing with them. This looks like it was so much fun.


Here are the racers relaxing by the cars after their victory laps. Images and party information from Urban Hoot.


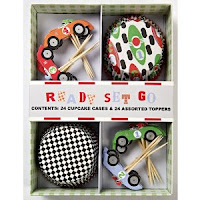
A few party supplies to make your NASCAR Racing Party special... 


Make sure to come back and visit our link up party starting tonight Thursday at 9:01 PM (PST) or Friday at 12:01 AM (EST). Share your awesomeness with us!


Sunday, March 11, 2012

Sock Monkey Party

Sock Monkeys have been around for about 80 years and have been making a big comeback the last few years! Usually the Sock Monkey is made with red heel socks. But, I have also seen some really cute pink and colorful Sock Monkeys.  Bethany Chase came up with some fun ideas using the classic stuffed animal for her son's birthday party. Bethany says, "We had this sock monkey party to celebrate the second birthday of my son, Carter.  I made the bunting and the labels for the candy and favors on Photoshop.  The kids made sock monkey puppets using brown paper bags (from the dollar store!).  I made the templates for the sock monkey on a manilla folder, and then just cut out all the pieces on 12x12 card stock scrapbook paper.  We used an assortment of glass jars and containers for candy--all coordinating with the brown and red color theme of the party."


Make your own Sock Monkey Puppet Directions. I love this idea!


 Puppet and photo booth prop.


Is this the cutest photo prop booth ever?? Bethany created quite the darling party!


 via here.

Did you know the sock on the left is a vintage red heel sock and the new version sock is on the right?


A few party supplies to make your Sock Monkey Party special...