Hi, I'm Rachel from
Lines Across My Face. I am so excited to be here guest posting at Design Dazzle. Thanks Toni for including me in your Christmas series!
I am the mother of these two cute little ones.
Lines Across has turned into mostly a
craft blog. Almost all of my projects {like my
scribble gift bows,
football onesie, and
felt flower tutorials} are simple enough that almost anyone could do them with things they already have around the house or a $5 trip to the craft store.
I wanted to make four felt Christmas trees, one for each member of our family. These trees are very easy to make and cost about 30 cents each. They are also so much fun because you can make many different versions and you can even let your kids help you decorate them.
These are generally based off of this
pom pom felt flower that I love to make.
First you need to make cardboard cones. You could also buy cones from the craft store or the dollar store. I used cardboard from cereal boxes which I rolled into cones, glued with a hot glue gun, and secured (at first) with rubber bands. I found that they were very sturdy, especially once they were covered with felt. Keep in mind that some of the cereal box could show through.
Next, you need to make a lot of felt "leaves" (like the pom pom flowers). For my first tree, I cut strips of felt that were about 2.5 inches wide. Then I folded over the strips and glued the edges together with a hot glue gun. (If you use too much glue, the strips will harden and become difficult to work with). Next, I cut notches across the strips, about 1 cm wide, making sure to not cut through the glued edges. You can play around with different size strips and cuts, but I found that it looks best to be consistent with each tree.
Now, you start gluing the felt strips around the cardboard. I made a lot of different rings. When I got to the end of the circle, I cut the felt strip and then used it to start the next layer. I also added a small cardboard circle to the base of the tree for support.
I made 4 different trees for each of the members of my family. If your kids are a little older, they can have a lot of fun helping to decorate their own tree.
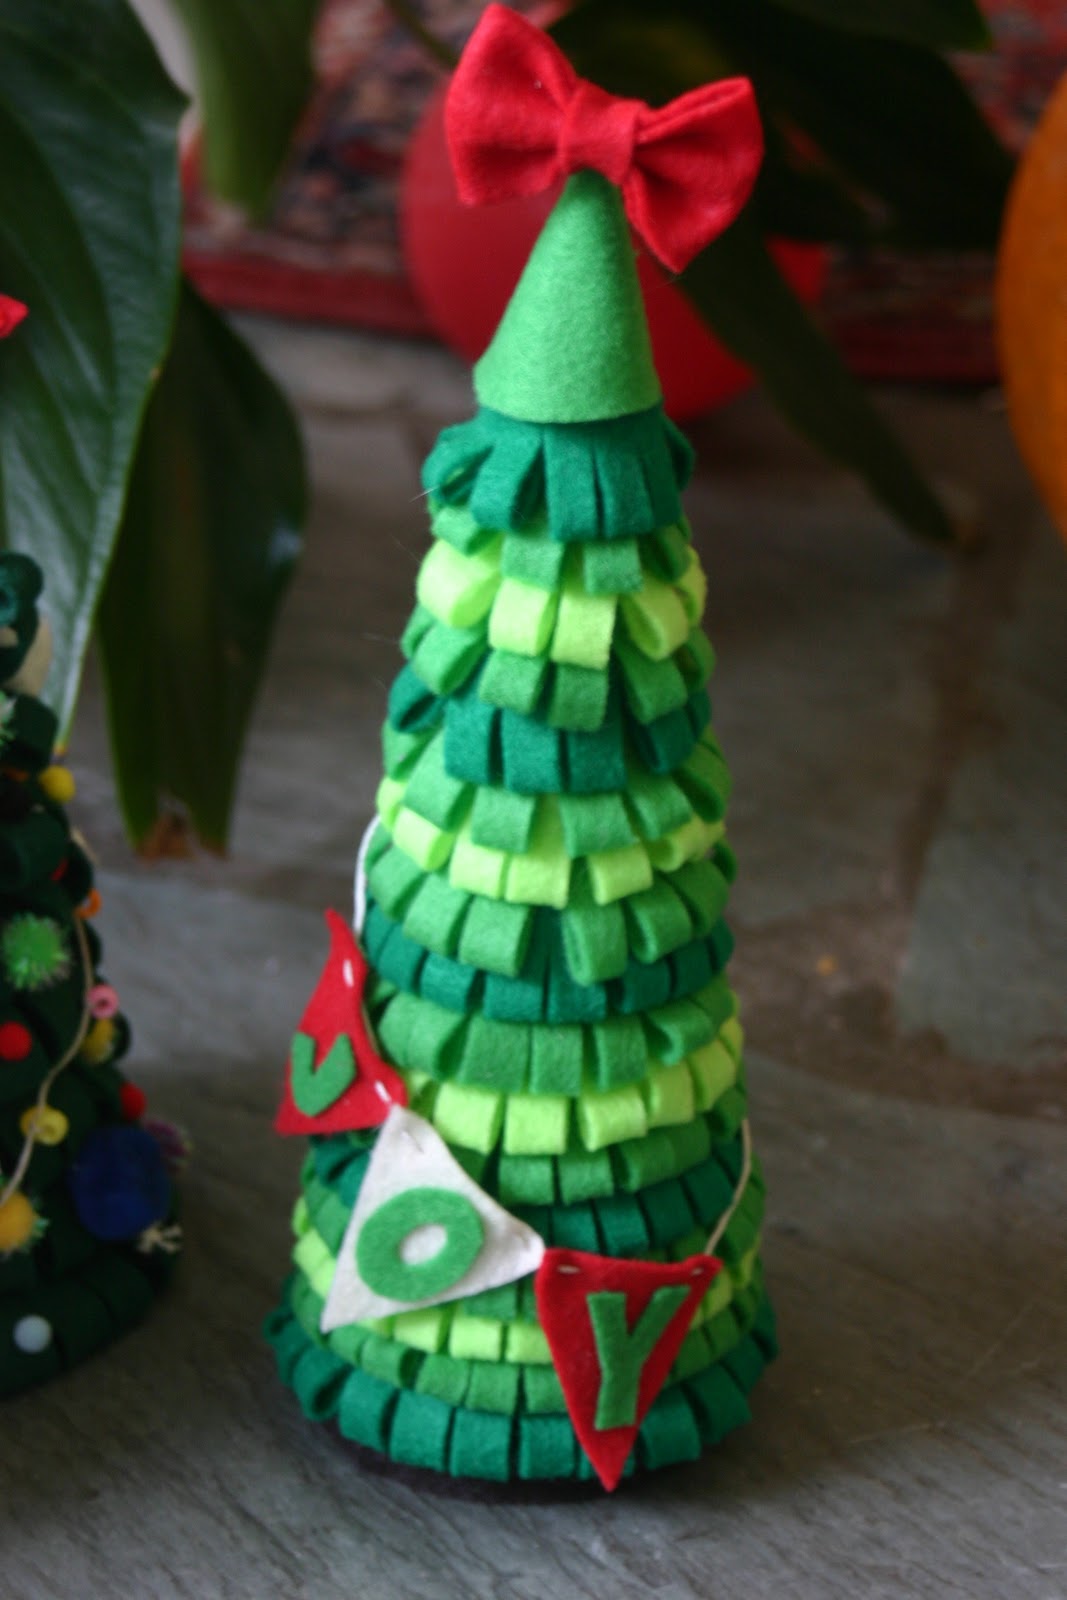
My treeI made the cone a little bit thinner than the kids' trees. I cut the strips at 2 inches wide and the notches at about 1/3 inch wide. I added a
felt bow to the top. I also cut out three felt triangles, glued on the letters J-O-Y, and quickly sewed them together into a mini bunting. I alternated the shades of green felt for each layer. I also added a plain brown strip of felt around the bottom to look like the stump.
Grant {my husband}'s tree
I made Grant a Dallas Cowboys tree. I topped it with a silver star and used alternating blue and silver rows of felt leaves. I cut out brown football shapes, stitched them together, and wrapped them around the tree.
Benjamin's treeBenjamin's tree was the simplest. I just glued buttons (which he LOVES) to the different leaves around the tree.
Lyla's treeLyla's tree is the fun kid tree. I glued on pom poms, snowflakes, etc. I also tied little beads along a piece of embroidery floss and wrapped it around the tree like little lights.
(I also used bamboo skewers for grilling to hold up the stars. They are much cheaper than anything you would find at the craft store.)
Thanks again, Toni for having me! I would love for you all to stop by and check out
Lines Across or follow me on
Facebook.