Reuse and recycle. Recycled junk can actually be made into some very usable items not to mention unbelievably awesome items. Could this darling pink kitchen be any cuter? Jane from outofthecrayonbox is the mastermind behind this kitchen - check out her tutorial for more photos and instructions. This is the AFTER photo. Check out the before photos below.
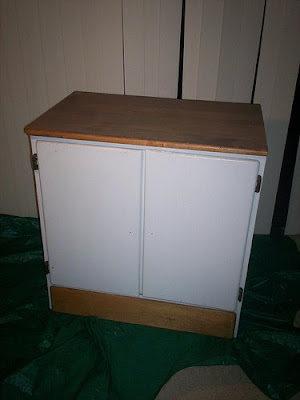
 BEFORE:
 Jane: This is the cabinet that I found on the curb in the ally behind our building about three years ago. I brought it home and it sat on our balcony waiting for a purpose. Whenever my husband asked, I said, "Someday I will make something out of it."
I really wanted to use as much of what I had and spend as little as possible on this. It is a challenge to use what you have and make the best of it. I knew the doors would be re purposed. One door would become the divider for the kitchen set creating a sink and shelf area and a separate oven area. The other door would be cut to make two new doors.

 Jane: For the sink I bought a small bowl with a lip at Big Lots. The lip is very important because it will support the bowl in the hole.I measured the bowl under the lip and drew a circle to that size on the cabinet top. I do not have a jig saw so I drilled holes all around the circle with my power drill and the largest drill bit. This took a long time. Then I used a smaller bit to drill holes in between the other holes. Finally, I hacked at the spaces between the holes with my screw driver and a hammer. As a result it looks like a beaver chewed the hole. You can kind of see this in this picture although, primer hides a multitude of sins. I had to sand the rough circle a lot to prevent splinters. The rough cut does make for a nice snug fit though. I think this proves that with a little ingenuity, one doesn't need a bunch of fancy tools.
I looked at all sorts of things at Lowes and Home Depot to become a faucet. Ultimately, a decorative letter "J" (from Michaels Craft Store $2) turned upside down and screwed in place seemed the easiest. I pre-drilled a hole in the "J" but it still cracked big time when I screwed it in place. To fix this I quickly poured wood glue in the cracks and held it together with a large binder clip over night. I am happy to report it is super solid. Once painted with primer the cracks are invisible. Primer makes such a difference. I used Kilz 2 Latex primer and was really happy to discover that it is low odor.It's very easy to use and it covers very well.
 Jane: After painting the whole kitchen with primer and pink paint I added the burners. To make the burners I traced a roll of scotch tape and painted it with grey craft paint. Then I went over the circles with the silver craft paint. I cut 2" pieces of dowel and sanded one side flat. Then I painted each piece with black craft paint and glued them to the gray circles.
 Thank you Jane for the inspiration to create something so unique and fun. And to top it all off - little money was used for this project.