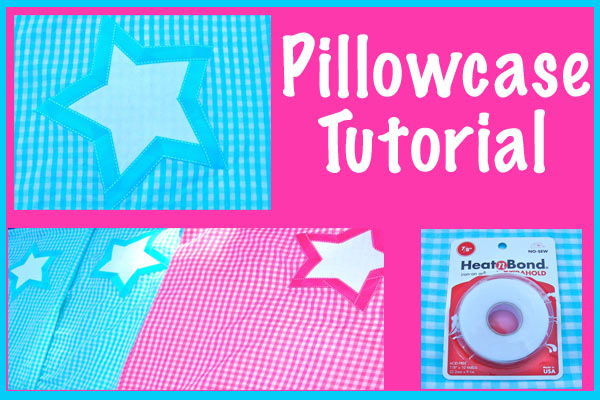
 My sixteen year old daughter was a YCL (youth camp leader) for girls camp. She and her friend made eight of these pillowcases for the 13/14 year old girls in their cabin group (they were named the all stars). The girls at camp loved them! The pillowcases were fairly inexpensive to make and didn't require much sewing skill. We found fabric for $2 a yard on the bargain shelf at Walmart.
Supplies:
1 yard fabric for pillowcase (44"/45" wide)
thread
Supplies - if you're adding the star:
1 yard ribbon to outline star
1/3 fabric for star
fusible bonding for fabric (heat n' bond)
Heat-n-Bond 7/8" wide on a roll
If using 1 yard of fabric 44"/45" wide, no need to cut.
1. Fold the fabric piece in half lengthwise and match selvage edges, with the right sides together.
2. Sew the fabric together along the long side and one of the short ends. Make a 1/2 inch hem (fold fabric down twice) on the end of the pillowcase that hasn't been sewn. Sew a straight stitch to keep hem in place. Turn inside out. When finished the pillowcase measures 22 x 35" just the perfect size for a camp pillowcase or (queen size) pillowcase.
 3. For the star template - print out the one provided and enlarge to 150%. When enlarged it is too big for an 81/2 x 11 piece of paper, print out twice, cut out and piece together with tape. Use this star as a pattern.
 4.Cut out star shape of the 1/3 fabric (we used white flannel) and the fusible bonding. Use instructions to attach the fabric and fusible bonding. Attach star to the pillowcase -we placed the star more in the corner (so sleeping faces would be on the smooth fabric).
5. Iron the heat-n-bond to the ribbon. Cut out 10 pieces of ribbon (for the 10 sides of the star). The ribbon we used looks like it is sewn around the star because of the white stitching, but the ribbon came that way. Place the cut pieces of ribbon around the perimeter of the star (which has already been bonded to the pillowcase)- iron ribbon in place. My daughter and her friend were not expert seamstresses, so we made it easy and went with heat-n-bond.
 Voila! Easy project and at about $4 each it didn't break the bank. This is a wonderful project to make for a beginner sewer. If you've been thinking of making a summer project with your kids, try this! You can get as simple or as fancy as you would like, you can even add trim/ribbon to the opening edge of the pillowcase! Kids like picking their own fabrics and it gives them a great sense of accomplishment.